By Elizabeth Fagg-Shuttlewood ACR
While working at Wellcome Collection, I had to consolidate the media on over 200 watercolour paintings, and I had the chance to explore a few different consolidation techniques and setups. The most effective solution I found was to use a medical nebuliser with custom modifications. In this article I discuss some of the issues I encountered with the nebuliser and the solutions I came up with.
I needed a consolidant with a matte finish that was suitable for watercolours. After looking through the literature and talking to other conservators, I settled on these three:
- 1% ethyl hydroxyethyl cellulose (Bermocoll®) in deionised water with ammonium hydroxide and ethanol
- 0.75% funori in deionised water with ethanol
- 1% gelatine in deionised water with ethanol
The full recipes I used are at the end of the article.
The medical nebuliser
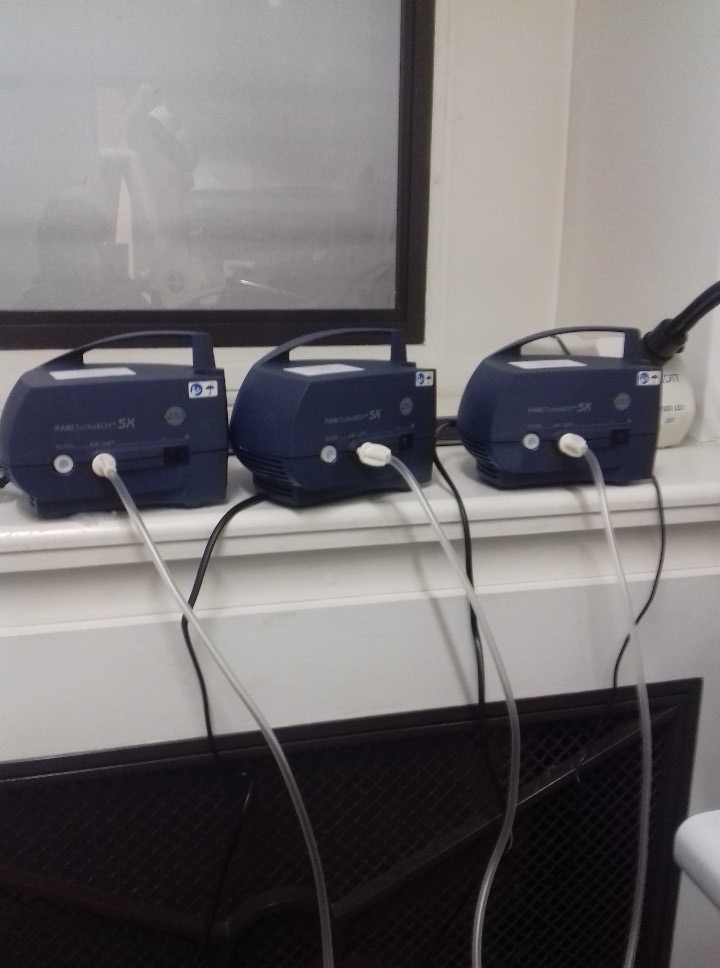
Medical nebulisers are used to treat asthma by inhaling medicine, and conservators can use them to spray consolidants as a fine mist. They are small, relatively inexpensive and available to buy online, so they work well for conservation studios with smaller budgets.
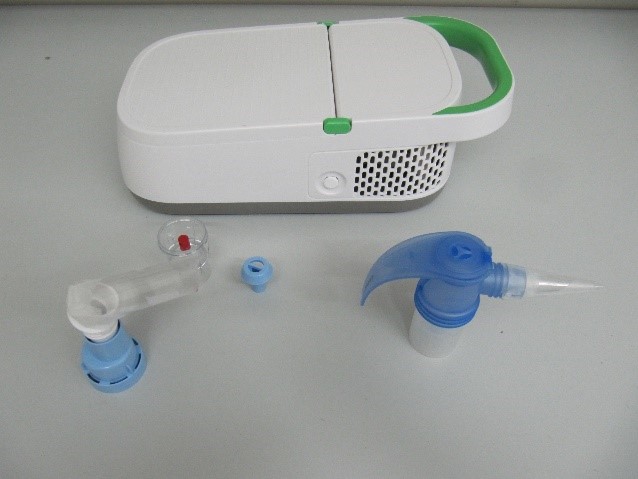
Out of the box, the nebuliser comes with a mask and mouthpiece, which are not useful in conservation. It needs to be modified in some way. Conservators who worked at Wellcome Collection before me had used a tapering nozzle made from Melinex® attached with tape to the medicine distribution chamber.

While I did manage to consolidate some images with this setup, it was too slow and unreliable to be practical for a large-scale mass consolidation project. Many problems arose.
Problems with the medical nebuliser
- The small nozzle limits the area that can be consolidated, making the process very slow.
- The nebuliser container needs to be held horizontally or it drips onto the artwork.
- There are tubes under the handheld container, which could damage the image if they touched it. Large artworks can be difficult to safely consolidate towards the middle.
- The consolidant mist is clear and hard to see, making it difficult to know what parts of the object have been successfully consolidated.
- The setup doesn’t work for consolidants that must be kept warm – the small container cools down too quickly.
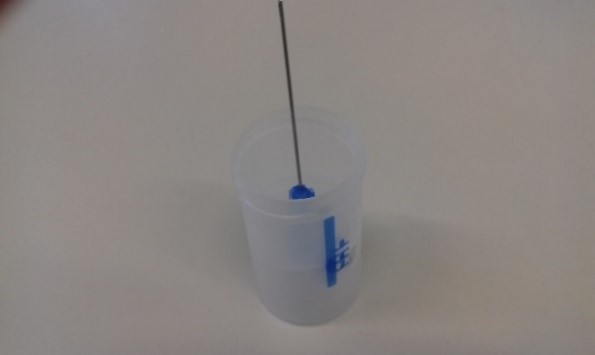
- The nebuliser gets blocked when the consolidant froths. This blocking can occur very frequently, interrupting consolidation till the blockage is cleared. But as the mist is hard to see, it can be hard to tell if the nebuliser is misting or not. The blockage can be cleared by inserting a needle into the tiny hole in the middle. This process is time-consuming and really slows things down!
- I could only get a few seconds of working time before the problems started: ethyl hydroxyethyl cellulose and funori frothed and blocked the nebuliser, and gelatine cooled down too much to mist.
To consolidate the 200 watercolour paintings, I needed modifications to cover more area quickly and to keep the container warm. I also had to try to overcome the frothing issue.
An angled nozzle
To increase the area being consolidated, I made a wider nozzle cut at an angle.
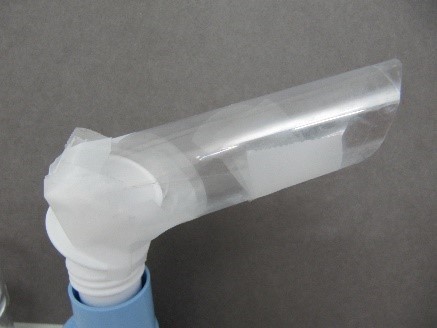
However, I found that this design caused a lot of consolidant to remain suspended in the air instead of falling onto the object. I was actually having to do more applications to build up the consolidation to an effective level, which was very time-consuming. Eventually I settled on a mix of the two nozzle designs: a tapering fine nozzle, but with a hole cut at a slight angle. The smaller nozzle produced a more dense stream of consolidant, fixing the paint more rapidly.
A sloping support for the object
I positioned the object on a slight slope, mirroring the angle of the nozzle. The support was made from a book wedge with an archival board resting on it. The board had a lip on the underside of the top edge so that it would not slide off the wedge. A lip can also be added to the bottom edge of the top face if required. A Plastazote® layer on top prevents the artwork from slipping. I used snake weights to hold it in place.
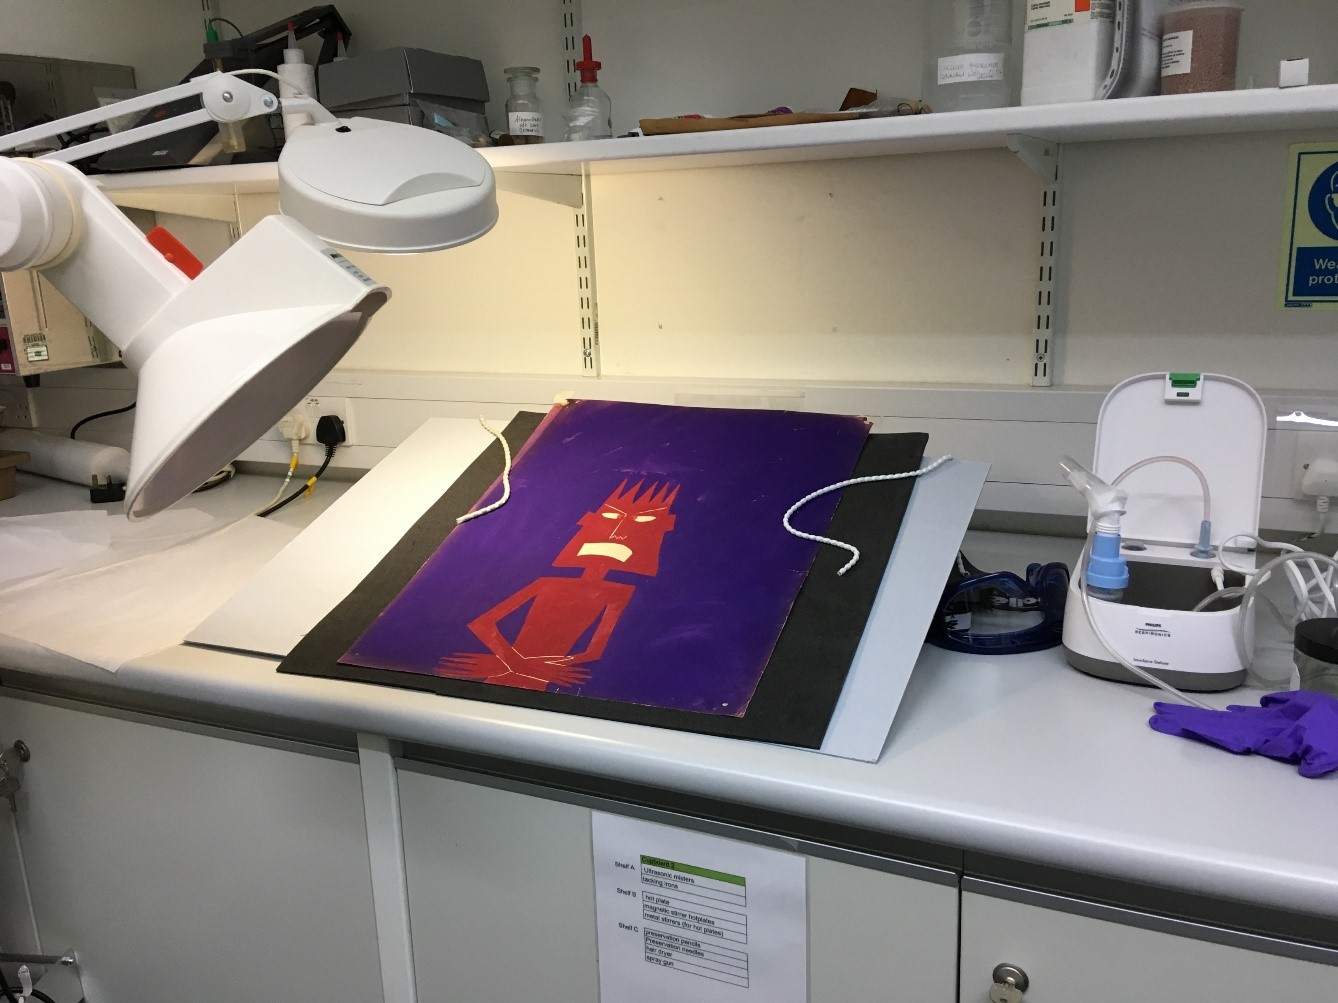
This means the conservator can work with the nebuliser held facing forward, so that the object is in front of the nozzle and the cables hang away from it. This means there’s no risk of the cables hitting the object.
The advantage of this setup is that the consolidant mist goes directly forward onto the painting, allowing the conservator to work up and down the picture to ensure even coverage. However, the process was still really, really slow, and there were hundreds of pictures to consolidate.
A triple whammy!
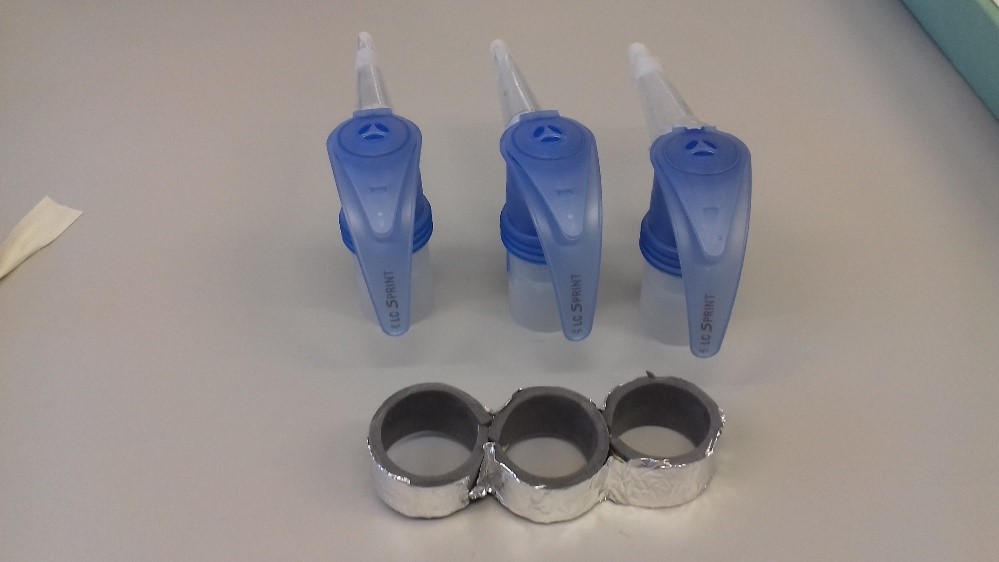
I invested in two additional medical nebulisers, deciding to try and see if I could create a triple nebuliser system.
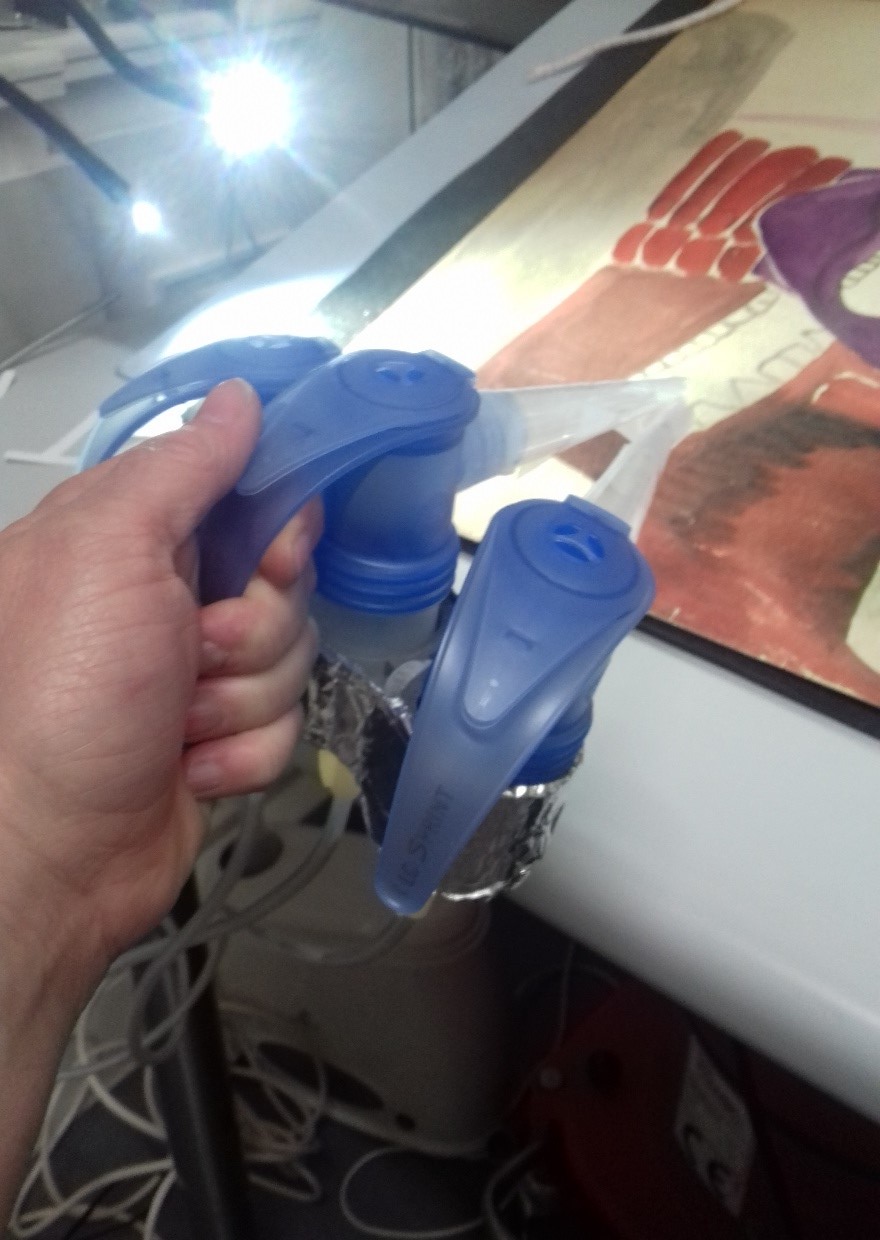
I created a line of three rings to join together the three nebuliser chambers. I made them from strips of Plastazote®, held together on the outside with foil-coated tape. This held the three containers together and also provided insulation. The rings formed a little insulated coat around the consolidant, keeping it warm if needed. All three nebulisers could be controlled with one handle. A piece of cotton tape can also be added for extra strength to tie the three rings together.
If one machine clogged, I could still continue with the other two. The work went much faster.

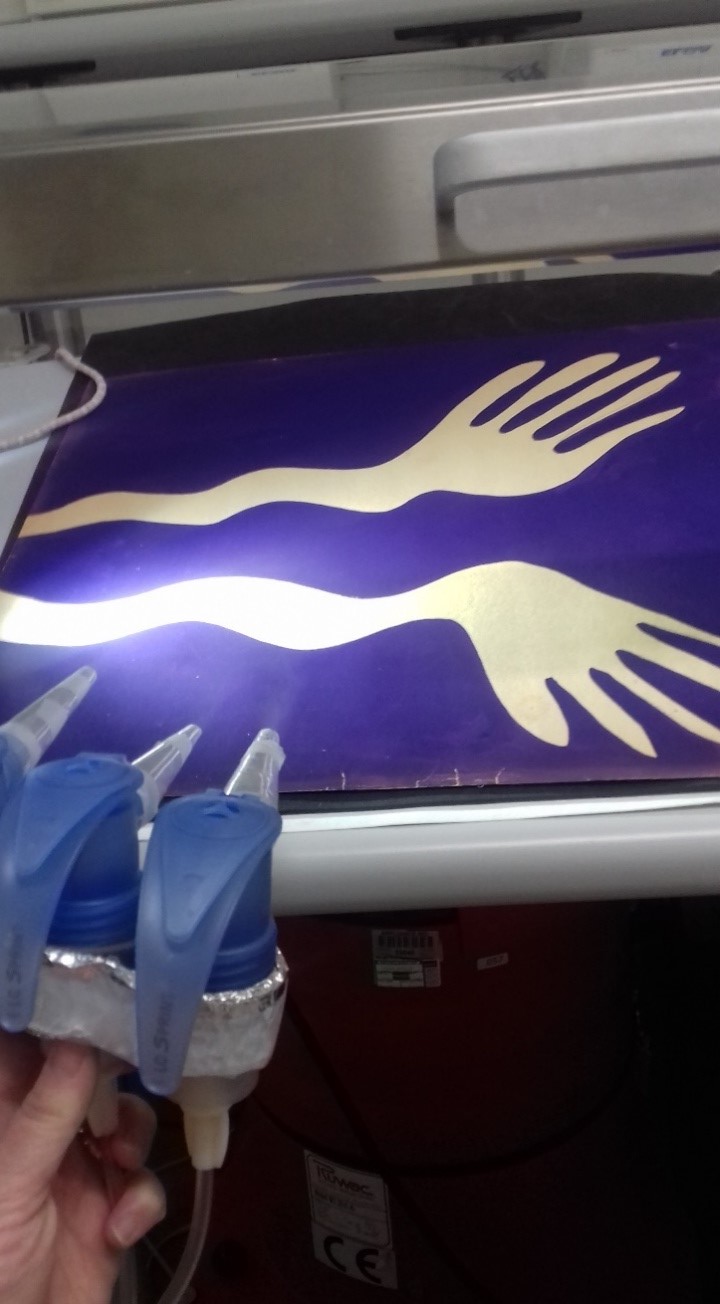
A raking light
I added a bright raking light to help me see the fine clear mist of the consolidant. This worked best with the light positioned quite low down. It helped me see where the consolidant was falling on the image. It was also easier to tell when the nebulisers were blocked and the mist stopped coming out.
Benefits of the final setup
- The insulated jacket kept the contents warm enough that gelatin could be used.
- The warmth from the insulated jacket also improved the working properties of the ethyl hydroxyethyl cellulose (Bermocoll®) and funori. They frothed less and did not block the nebuliser so frequently. Keeping them slightly warmer helped them mist more easily.
- If there was a blockage in one container, the other two still ran and I could continue working. Clogging no longer interrupted my work.
- The nebulisers were easy to refill and easy to hold.
- The triple system increased the area I could cover, speeding up the treatment.
- The three nebulisers could be pointed in different directions at the same time. This is really useful for covering large solid areas of paint, as well as for patterns of repeating lines and stripes in the image. I could direct the nozzles at three separate lines of paint and consolidate them at the same time with just a few sweeps of the nebuliser.
- Alternatively, I could aim all three nozzles at the same spot. This is very useful in areas where heavier consolidation is required to fix the paint.
A note about the consolidants
The three consolidants I used were ethyl hydroxyethyl cellulose (Bermocoll®), funori, and gelatine.
I found that different colours in the image responded better to one consolidant than another. For instance, gelatine worked well with most pigments, but because of the fast cooling I could not get much use out of it initially. When using the other two consolidants, I found that the purple paint only consolidated quickly with ethyl hydroxyethyl cellulose, which was also the easiest consolidant to prepare and work with. Unfortunately, it did not consolidate the red paint.
The red paint only became stable with repeated applications of funori. This consolidant was the most cumbersome to prepare, as it needs to soak for 24 hours before use. It needs careful work planning. Once I finalised my setup, gelatine became my consolidant of choice. It worked as a consolidant for all pigments. However, the insulated jacket system was essential – without it, the gelatine quickly cooled down and became too thick to nebulise as a mist.
To check if the consolidation had worked, I touched the consolidated area with a piece of blotting paper to see if anything offset onto the fibres. Initially the paint offset with even the lightest touch of blotter fibres or a brush. After a successful consolidation, no paint offset when the blotter was touched to the paint.
Other observations
I tried several other setups during the consolidation of the 200 paintings. Here are a few extra tips.
- While using the three-nebuliser system, I noticed that there was a lot of floating mist building up in the air around the image. I tried working under a dome to encourage the extra mist to settle on the painting. I used a humidification chamber, propped up at the front to allow me to work. This did help deflect the mist down onto the painting. However, the sloping support did not fit, so I had to revert to laying the image flat.
- When working flat on a table, I had to keep rotating the painting to access all four sides. This worked for smaller paintings, but on larger ones I could not reach the middle safely. The nebuliser cables could strike the surface. Therefore, both flat and sloping techniques were useful, depending on the size of the painting and location of the paint in the image.
- Raking light set low down was essential to monitor where the mist was falling on the image.
- Humidifying the painting before consolidation gave better results.
- I also tried using an ultrasonic aerosol generator, which some conservators had used for mass consolidation as well. Unfortunately, AGS 2000, the specific model that I had seen successfully used, is reportedly discontinued. I tried using other ultrasonic aerosol generators that were suggested as alternatives but was unable to get them to mist the consolidants.
- Health and safety: localised fume extraction and PPE are both essential when using nebulisers. I used local extraction, glasses and an FFP3 mask.
Consolidant recipes
Gelatine (1%)
Weigh out 2 g of gelatine granules or sheets
Mix with 200 ml deionised water
Soak for 30 mins
Heat in a double boiler to no more than 70 °C until all the gelatine goes into solution. Stir while heating
Add 5 ml ethanol
Apply warm
Bermocoll®, ethyl hydroxyethyl cellulose (1%)
Measure out 100 ml deionised water
Use drops of ammonium hydroxide to adjust pH to 6.5–7
Weigh out 2 g ethyl hydroxyethyl cellulose
Sprinkle over the water and stir
Keep stirring for one hour (use a magnetic stirrer if available)
Leave to settle overnight
Add 5 ml ethanol
Add another 100 ml deionised water
Funori (0.75%)
Tear funori into small fragments. Discard dark fragments
Weigh out 3 g of funori fragments
Add 100 ml deionised water
Leave to soak overnight
Cook the mixture on a double boiler until mucilage dissolves completely (about 30 mins). Keep the temperature under 80°C
Strain the solution through cotton
The resulting concentration is 3%. For misting, add another 300 ml of deionised water and 10 ml ethanol (final concentration 0.75%)
Does not gel on cooling. Keep in a refrigerator. Warm up before use.
Elizabeth Fagg-Shuttlewood (ACR) trained as a book and paper conservator at Camberwell College of Arts, graduating in 1994. She is currently the exhibition and loans conservator at the British Library, and has previously worked at The National Archives and Wellcome Collection. She has also worked freelance at Middle Temple Library, Leeds Castle, the Victoria and Albert Museum, and the London Metropolitan Archives. She became an accredited library and archives conservator in 2020. Elizabeth is also the conservation manager of the Archaic Treasures Conservation Studio, where she has gained extensive experience in complex conservation projects, working for small museums, historic houses and private clients.
